
Organic Self‑Tanner & Drops Bundle: Fast Glow in 3–5h ✨
Discover how to achieve a flawless self-tan with our comprehensive guide that covers everything from skin prep to application techniques. Get ready to glow with confidence!
The Ultimate Guide to Flawless Sunless Tanning
Why is Skin Preparation Important for Tanning?
Achieving a natural-looking, even sunless tan starts with proper skin preparation. Your skin's condition plays a crucial role in the final results, so taking the time to get it ready can make all the difference.
Proper skin preparation ensures the tanning solution applies smoothly and evenly, minimizing the appearance of streaks, patches, or uneven coloration.
- Exfoliating removes dead skin cells and allows the tanning product to bind evenly to the skin's surface.
- Moisturizing creates a smooth canvas for the tan, helping it last longer and fade more gradually.
- Addressing any problem areas, like rough elbows or knees, prevents those spots from absorbing more color than the rest of your body.
What Steps Should You Take Before Applying Fake Tan?
Before you even think about applying a self-tanner, it's essential to take the necessary steps to prepare your skin. This will ensure the best possible results and help your tan last longer.
Here's a step-by-step guide to getting your skin ready for a flawless sunless tan:
- Exfoliate your entire body using a gentle scrub or body brush. This removes any dead skin cells and creates a smooth, even surface for the tanner to adhere to.
- Shave or wax any areas you want to tan, as this helps the product apply more evenly.
- Thoroughly cleanse your skin, making sure to remove any lingering oils, lotions, or deodorants that could interfere with the tanning process.
- Moisturize your entire body, paying extra attention to drier areas like elbows, knees, and ankles. This helps the tanner develop more evenly.
- Apply a thin layer of petroleum jelly or body balm to any areas you want to avoid, such as the palms of your hands, soles of your feet, and around your nails.
How Do You Exfoliate and Moisturize Effectively?
Proper exfoliation and moisturization are key steps in achieving a flawless sunless tan. By following these tips, you can ensure your skin is prepped and ready to embrace the color.
Exfoliating:
- Use a gentle, non-abrasive scrub or body brush to slough off dead skin cells.
- Focus on rough, dry areas like elbows, knees, and heels, but avoid over-scrubbing sensitive skin.
- Exfoliate 1-2 days before applying your self-tanner for best results.
Moisturizing:
- Apply a rich, creamy moisturizer all over your body, paying close attention to drier areas.
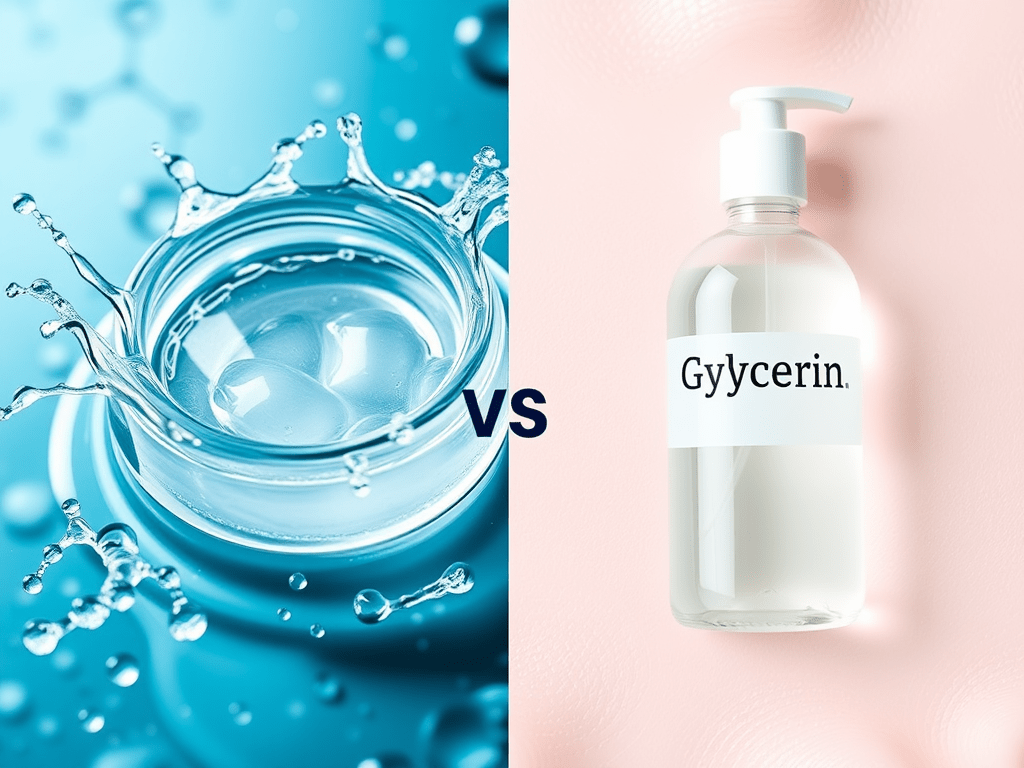
- Look for formulas with hydrating ingredients like shea butter, glycerin, or hyaluronic acid.
- Moisturize daily, especially in the days leading up to your self-tanning session.
- Apply a thin layer of moisturizer right before applying your self-tanner for optimal blending.
Proper exfoliation and moisturization are the foundations of a flawless sunless tan. By taking the time to prepare your skin, you'll ensure an even, long-lasting glow that looks completely natural.
What Areas Need Extra Attention?
While your entire body needs attention when prepping for a sunless tan, there are certain areas that require a little extra care and consideration.
Tricky Spots:
- Elbows, knees, and ankles - These drier, rougher areas tend to absorb more tanning solution, leading to uneven color. Exfoliate and moisturize them thoroughly.
- Hands and feet - The skin on your palms and soles is thicker, so apply a barrier cream to avoid excessive darkening.
- Hairline and eyebrows - Use a small amount of petroleum jelly or balm to prevent the tanner from adhering to these areas.
- Cuticles and nails - Apply a thin layer of cuticle oil or balm to protect your nails from becoming discolored.
Targeted Attention:
- Spend a little extra time exfoliating and moisturizing any areas you want to appear more bronzed.
- Apply a targeted self-tanner or bronzer to these specific zones for a customized, natural-looking glow.
- Be cautious not to overdo it, as this can lead to an unnatural, patchy appearance.
Are There Any Products to Avoid Before Tanning?
When preparing your skin for a sunless tan, it's important to be mindful of the products you use in the days leading up to your application. Certain ingredients and formulas can interfere with the tanning process, resulting in an uneven or unsatisfactory result.
Products to Avoid:
- Harsh exfoliants - Abrasive scrubs, loofahs, or body brushes can over-exfoliate the skin and cause the tanner to appear splotchy.
- Oil-based moisturizers - Heavy creams and oils can create a barrier that prevents the tanning solution from bonding properly.
- Deodorants and antiperspirants - These can leave behind residues that repel the tanning product.
- Makeup and sunscreen - These can also create a barrier and prevent even color development.
The Golden Rule:
- Stick to gentle, water-based products in the days leading up to your self-tanning session.
- Avoid anything overly fragranced, as strong scents can interfere with the tanning solution.
- Discontinue use of any problematic products at least 24-48 hours before applying your sunless tanner.
Properly preparing your skin is the key to achieving a flawless, natural-looking sunless tan. By following these guidelines and avoiding potential pitfalls, you'll be well on your way to a radiant, streak-free glow.
The Ultimate Guide to Achieving a Flawless Faux Glow
What Tools Do You Need for a Smooth Application?
Achieving a sun-kissed, radiant complexion can feel like a daunting task, but with the right tools and techniques, you can effortlessly create a natural-looking, streak-free tan. The key to a seamless faux glow lies in the tools you use.
Invest in a High-Quality Self-Tanning Product
- Choose a formula that suits your skin type and desired level of coverage.
- Look for a product that contains nourishing ingredients like aloe vera or vitamin E to keep your skin hydrated.
- Opt for a gradual tanning formula if you're new to self-tanning or prefer a more subtle, buildable result.
Utilize a Tanning Mitt
- A tanning mitt helps to distribute the product evenly and prevents unsightly streaks or patches.
- Look for a mitt with a soft, velvety texture that won't tug or irritate your skin.
- Ensure the mitt is clean and free of any residue before each use.
Exfoliate Beforehand
- Thoroughly exfoliating your skin before application is crucial for achieving a flawless, long-lasting tan.
- Focus on areas like elbows, knees, and ankles, which tend to be drier and can absorb more product, leading to uneven results.
- Use a gentle, oil-free exfoliator to slough away dead skin cells without stripping your skin.
How Do You Apply Fake Tan Evenly?
Applying self-tanner can be tricky, but with a few simple techniques, you can achieve a seamless, streak-free glow. Follow these steps for a professional-looking application.
Start with a Clean, Moisturized Canvas
- Begin by cleansing your skin thoroughly to remove any dirt, oil, or residue that could interfere with the tanning process.
- Apply a thin layer of unscented, oil-free moisturizer to areas that are prone to dryness, such as your elbows, knees, and ankles.
- Allow the moisturizer to fully absorb before proceeding with the tanning application.
Apply in Sections
- Divide your body into manageable sections, such as your legs, arms, and torso.
- Work in small, circular motions, blending the product seamlessly from one area to the next.
- Pay extra attention to difficult-to-reach spots, like the backs of your hands and feet, to ensure even coverage.
Blend, Blend, Blend
- Use your tanning mitt to blend the product thoroughly, focusing on the edges and any areas that appear darker or more concentrated.
- Gently buff the skin to ensure a flawless, natural-looking finish.
- Don't forget to wash your hands thoroughly after application to avoid unsightly staining.
What Are the Common Mistakes to Avoid?
Self-tanning can be tricky, and even the most experienced users can fall victim to common mistakes. Steer clear of these pitfalls to achieve a flawless, long-lasting glow.
Neglecting Proper Preparation
- Skipping the exfoliation step can lead to uneven absorption and a patchy, blotchy appearance.
- Failing to moisturize can cause the tanner to cling to dry areas, creating an unnatural-looking result.
Applying Too Much Product
- Overloading your skin with self-tanner can result in a dark, unnatural-looking tan that can be difficult to correct.
- Start with a small amount of product and build up the color gradually to achieve your desired level of coverage.
Forgetting About Tricky Areas
- Elbows, knees, ankles, and feet are prone to absorbing more product, leading to a darker, uneven appearance.
- Be sure to use a light hand and blend thoroughly in these problem areas.
Not Allowing Enough Drying Time
- Rushing through the application process can cause the tanner to transfer onto your clothes or bedding, creating an unsightly mess.
- Give the product ample time to fully dry and develop before getting dressed or going to bed.
How Can You Get to Those Hard-to-Reach Areas?
Achieving a flawless, all-over tan can be a challenge, especially when it comes to those hard-to-reach areas. But with a few clever techniques, you can ensure every inch of your skin is perfectly bronzed.
Use a Tanning Mitt with a Long Handle
- A tanning mitt with an extended handle allows you to easily reach your back, shoulders, and other difficult areas without contorting your body.
- Look for a mitt that is both flexible and sturdy to ensure even, streak-free application.
Enlist the Help of a Friend
- Asking a trusted friend or family member to lend a hand can make the tanning process much easier and more efficient.
- Have them gently apply the product to your back, using the tanning mitt to blend seamlessly.
- Remember to switch roles and return the favor for an all-over, flawless glow.
Utilize a Tanning Applicator Wand
- A tanning applicator wand is a game-changer for reaching those hard-to-get spots.
- With a long, flexible handle and a soft, cushioned applicator head, you can easily apply self-tanner to your back, feet, and other tricky areas.
- The wand's unique design allows you to control the amount of product and ensure even, streak-free coverage.
How Do You Achieve a Natural-Looking Finish?
The key to a flawless, natural-looking faux glow lies in the application process. By following a few simple tips, you can create a sun-kissed, radiant complexion that looks effortlessly beautiful.
Start with a Gradual Tanning Formula
- Gradual tanning products allow you to build up the color slowly, ensuring a more natural, seamless result.
- Gradually layering the product over several days or weeks can help you achieve your desired level of bronze without risking an unnatural, overly dark appearance.
Blend Thoroughly
- Proper blending is crucial for creating a natural-looking tan.
- Use your tanning mitt to buff the product into your skin, paying close attention to the edges and any areas that appear too concentrated.
- Blend, blend, and blend some more to ensure a flawless, seamless finish.
Embrace Your Undertones
- Choose a self-tanning formula that complements your natural skin undertones for the most natural-looking result.
- If you have cool-toned skin, opt for a tanner with more pink or olive undertones.
- Those with warm-toned skin will look best with a formula that has golden or reddish undertones.
Achieving a flawless, natural-looking faux glow is an art form, but with the right tools and techniques, it's a skill anyone can master. By investing in high-quality products, exfoliating thoroughly, and blending with precision, you can create a sun-kissed complexion that looks and feels utterly radiant. Remember, confidence is the key to rocking your faux tan, so embrace your glow and let it shine!
Achieving a Sun-Kissed Glow: Your Guide to Flawless Self-Tanning
What Aftercare Should You Follow Post-Tanning?
After achieving your desired sun-kissed glow through self-tanning, it's crucial to follow the proper aftercare routine to ensure your tan lasts and looks its best. Here are some key steps to keep in mind:
Moisturize, Moisturize, Moisturize
- Keeping your skin hydrated is essential for maintaining an even, long-lasting tan.
- Apply a fragrance-free, oil-free moisturizer immediately after showering and throughout the day.
- Avoid hot showers, as they can strip away your tan. Opt for lukewarm water instead.
- Exfoliate gently every few days to slough off dead skin cells and prevent patchiness.
Avoid Sweat and Water
- Steer clear of activities that can cause excessive sweating or exposure to water, such as swimming, working out, or heavy-duty cleaning.
- If you must engage in these activities, be sure to reapply your self-tanner afterward to maintain an even, consistent color.
- Use a tinted moisturizer or bronzer to touch up any areas that start to fade.
Protect Your Tan
- Always use a broad-spectrum sunscreen when going out in the sun, as UV exposure can cause your tan to fade prematurely.
- Look for a sunscreen with an SPF of 30 or higher and reapply it every two hours.
- Wear protective clothing, such as long-sleeved shirts and wide-brimmed hats, to further shield your skin from the sun's damaging rays.
By following these aftercare tips, you'll be able to extend the life of your flawless self-tan and enjoy a radiant, sun-kissed glow for weeks to come. Remember, consistency is key when it comes to maintaining a natural-looking, long-lasting tan.
How Do You Avoid Getting Streaks?
Achieving an even, streak-free self-tan can be a challenge, but with the right techniques and products, it's entirely possible. Here are some tips to help you avoid those unsightly streaks:
Exfoliate First
- Start by thoroughly exfoliating your skin, paying special attention to areas like elbows, knees, and ankles, which tend to be drier and can absorb more self-tanner.
- Use a gentle scrub or exfoliating gloves to slough off dead skin cells and create a smooth, even canvas for your self-tanner.
- Make sure to rinse off any residual exfoliator before applying your self-tanner.
Apply in Sections
- Rather than trying to cover your entire body at once, work in small, manageable sections.
- This will help you ensure an even, streak-free application and prevent any missed spots.
- Start with your legs, then move on to your torso, arms, and finally, your face and neck.
Use the Right Tools
- Invest in a high-quality self-tanning mitt or applicator glove to ensure a seamless, streak-free application.
- These tools help to distribute the self-tanner evenly and prevent your hands from becoming stained.
- If applying with your bare hands, be sure to wash them thoroughly afterward to avoid unsightly palms.
Blend, Blend, Blend
- When applying your self-tanner, take the time to blend it in thoroughly, especially around the edges and in hard-to-reach areas.
- Use circular, sweeping motions to ensure the product is evenly distributed and fully absorbed into the skin.
- Pay extra attention to areas like elbows, knees, and ankles, where streaks are most likely to occur.
By following these simple steps, you'll be on your way to achieving a flawless, streak-free self-tan that will have you feeling confident and radiant. Remember, patience and attention to detail are key when it comes to self-tanning.
What Tips Ensure Your Tan Lasts Longer?
To get the most out of your self-tan and enjoy a long-lasting, natural-looking glow, it's important to incorporate a few key tips into your routine. Here are some strategies to help extend the life of your perfect tan:
Moisturize Religiously
- Keeping your skin hydrated is crucial for maintaining an even, long-lasting tan.
- Apply a fragrance-free, oil-free moisturizer immediately after showering and throughout the day.
- Avoid hot showers, as they can strip away your tan. Opt for lukewarm water instead.
- Exfoliate gently every few days to slough off dead skin cells and prevent patchiness.
Avoid Activities That Fade Your Tan
- Steer clear of activities that can cause excessive sweating or exposure to water, such as swimming, working out, or heavy-duty cleaning.
- If you must engage in these activities, be sure to reapply your self-tanner afterward to maintain an even, consistent color.
- Use a tinted moisturizer or bronzer to touch up any areas that start to fade.
Protect Your Tan from the Sun
- Always use a broad-spectrum sunscreen when going out in the sun, as UV exposure can cause your tan to fade prematurely.
- Look for a sunscreen with an SPF of 30 or higher and reapply it every two hours.
- Wear protective clothing, such as long-sleeved shirts and wide-brimmed hats, to further shield your skin from the sun's damaging rays.
Choose the Right Self-Tanner
- Opt for a self-tanner that is formulated with hydrating ingredients and contains a built-in bronzer or color guide.
- This will help you achieve an even, long-lasting tan and make it easier to spot any missed areas during application.
- Avoid self-tanners with alcohol or fragrance, as these can dry out your skin and cause your tan to fade more quickly.
By incorporating these tips into your self-tanning routine, you'll be able to enjoy a radiant, sun-kissed glow for weeks on end. Remember, taking the time to properly prepare and care for your skin is the key to a long-lasting, natural-looking tan.
How Can You Fix Mistakes If They Happen?
Even with the best of intentions and techniques, self-tanning mishaps can sometimes occur. But don't worry, there are ways to fix these mistakes and get your glow back on track. Here are some strategies to help you address common self-tanning issues:
Uneven or Patchy Tan
- If you notice certain areas are darker or more uneven than others, use a self-tanning remover or exfoliating scrub to lighten the affected spots.
- Reapply the self-tanner to those areas, making sure to blend it seamlessly with the surrounding skin.
- For a more targeted fix, use a corrective concealer or color-correcting product to even out the tone.
Orange or Streaky Appearance
- If your self-tan has turned out too orange or streaky, try using a self-tanning remover or a mixture of baking soda and water to gently exfoliate the affected areas.
- Once the excess self-tanner has been removed, reapply a more suitable self-tanner, being careful to blend it thoroughly.
- You can also try using a tinted moisturizer or bronzer to help tone down the orange hue and create a more natural-looking glow.
Unwanted Tan on Hands or Feet
- If your self-tanner has created an unsightly tan on your hands or feet, use a self-tanning remover or a damp washcloth to lighten the color.
- For a more targeted approach, apply a small amount of moisturizer or oil to these areas before self-tanning to create a barrier and prevent the product from sticking.
- Alternatively, you can use a self-tanning applicator mitt or gloves to avoid getting the product on your hands during application.
Fading or Patchiness
- If your self-tan starts to fade or become patchy, use a tinted moisturizer or bronzer to touch up the affected areas.
- Reapply a thin layer of self-tanner to the problem spots, being sure to blend it seamlessly with the surrounding skin.
- Remember to exfoliate and moisturize regularly to maintain an even, long-lasting tan.
By having these troubleshooting techniques in your back pocket, you'll be able to quickly and effectively address any self-tanning mishaps that may arise. With a little patience and the right tools, you can restore your flawless, sun-kissed glow in no time.
What Routine Should You Adopt to Maintain Your Tan?
Maintaining a beautiful, long-lasting self-tan requires a consistent and thoughtful routine. By incorporating the following steps into your regular skincare regimen, you can keep your glow looking fresh and radiant for weeks on end:
Exfoliate Regularly
- Gently exfoliating your skin a few times a week is crucial for keeping your tan looking even and preventing patchiness.
- Use a gentle scrub or exfoliating gloves to slough off dead skin cells, which can cause your self-tanner to cling unevenly.
- Pay special attention to areas like elbows, knees, and ankles, which tend to be drier and can fade faster.
Moisturize, Moisturize, Moisturize
- Keeping your skin hydrated is essential for maintaining a long-lasting, natural-looking tan.
- Apply a fragrance-free, oil-free moisturizer immediately after showering and throughout the day.
- Avoid hot showers, as they can strip away your tan. Opt for lukewarm water instead.
Retouch and Maintain
- Use a tinted moisturizer or bronzer to touch up any areas that start to fade.
- Reapply a thin layer of self-tanner to these problem spots, being sure to blend it seamlessly.
- If you notice any uneven or patchy areas, use a self-tanning remover or exfoliating scrub to lighten the color, then reapply the self-tanner.
Sun Protection is Key
- Always use a broad-spectrum sunscreen when going out in the sun, as UV exposure can cause your tan to fade prematurely.
- Look for a sunscreen with an SPF of 30 or higher and reapply it every two hours.
- Wear protective clothing, such as long-sleeved shirts and wide-brimmed hats, to further shield your skin from the sun's damaging rays.
Be Mindful of Activities
- Avoid activities that can cause excessive sweating or exposure to water, such as swimming, working out, or heavy-duty cleaning.
- If you must engage in these activities, be sure to reapply your self-tanner afterward to maintain an even, consistent color.
By following this comprehensive routine, you'll be able to keep your self-tan looking its best for weeks on end. Remember, consistency and attention to detail are key when it comes to maintaining a flawless, sun-kissed glow. With a little effort and the right products, you can enjoy a radiant, healthy-looking tan all season long.
Get a Radiant, Healthy-Looking Glow with These Clean Self-Tanning Essentials
DHA-Free Self Tanner + DHA-Free Self Tanner Drops Bundle
Get a natural-looking glow—without the DHA! This bundle pairs our bestselling DHA-Free Self Tanner Lotion with our Customizable Tanning Drops for a personalized, streak-free tan from head to toe.
Perfect for sensitive skin, clean beauty lovers, and anyone seeking a healthy, natural-looking tan—without harsh chemicals.
- 100% DHA-Free formula – no orange tones, no harsh chemicals
- Moisturizes with Shea Butter, Cocoa Butter, and Aloe Vera Juice
- Gentle, clean scent from Lavender & Lemon Essential Oils
- Perfect for daily body use

Organic Self Tanner + Self Tanning Drops Bundle – Fast Glow in 3–5 Hours!
Get the golden glow you crave—no sun required! Our Glimmer Goddess® Self Tanner and Customizable Self Tan Drops are formulated with clean, skin-loving ingredients and natural DHA to deliver a gorgeous, streak-free tan that develops in just 3 to 5 hours.
Whether you want an all-over bronze or a subtle facial glow, this duo puts tanning control in your hands. Build your perfect shade—gradual or bold—while nourishing your skin with organic oils and botanicals.
- Fast Results – See visible color within 3–5 hours
- Natural DHA – Delivers an even, sun-kissed tan without harsh chemicals
- Customizable – Mix the drops with your favorite moisturizer for targeted, buildable tanning
- Hydrating + Skin-Nourishing – Made with organic aloe vera, jojoba oil, shea butter, and more
- No Streaks, No Orange, No Strong Odor – Just radiant, healthy-looking skin

Q&A
Why is skin preparation important for tanning?
Proper skin preparation ensures the tanning solution applies smoothly and evenly, minimizing streaks and patches. Exfoliating removes dead skin cells, and moisturizing creates a smooth canvas for the tan.
What steps should you take before applying fake tan?
Exfoliate, shave or wax, cleanse, moisturize, and apply a barrier cream to palms and feet before applying self-tanner to ensure even application.
What areas need extra attention when tanning?
Focus on tricky spots like elbows, knees, ankles, hands, and feet that absorb more color. Use petroleum jelly on hairlines and nails to prevent over-tanning.
What products should be avoided before tanning?
Avoid harsh exfoliants, oil-based moisturizers, deodorants, and makeup that can create barriers and lead to uneven tanning results.
How do you apply fake tan evenly?
Apply in sections using a clean mitt. Work in circular motions and blend thoroughly, especially around edges to avoid streaks.
What aftercare should be followed post-tanning?
Moisturize regularly, avoid excessive sweating, protect your tan with sunscreen, and use gentle exfoliation to maintain an even skin tone.
How can you fix mistakes if they happen?
Address uneven tans with self-tanner removers, exfoliating scrubs, or corrective products. Reapply tanner carefully to blend and smooth out patches.
Achieving a flawless tan requires attention to detail in skin preparation, careful application, and diligent aftercare. By following this guide, you'll embrace a beautiful, natural-looking glow that enhances your confidence and style.
